Kayak Luvin’
Like a lot of people, I bought a kayak during this pandemic. It’s a used kayak. A good friend of mine bought a new one and I bought her old one. She gave me a good deal.
I may be crazy but I like to name my toys. I thought long and hard about what to name my new addition. It’s pale yellow and very long like an old Cadillac. Since it reminded me of an old man’s car it needed an old man’s name. I named it “Costanza”.
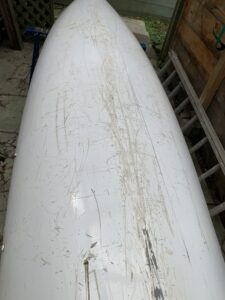
I got Costanza in the water as soon as I could and made the most of the summer. I took it on many amazing camping adventures. I would tell you about them, but this is not our Adventuring category, this is our Handy Fixes category. So what am I doing here? Well, as I said, this is a used kayak, so it was a little scratched and faded. It needed some kayak luvin’.
I asked a friend for advice on how to get rid of scratches … he told me to avoid rocks. Duh, I know that! So, no help from him. What did I do next? I asked Google of course. Google knows all.
So how do you polish up a kayak? First of all I should let you know you that Costanza is a fiberglass kayak. There are lots of plastic ones out there and scratch repair on them is completely different. So don’t follow any of these suggestions for a plastic kayak. Sorry you will have to ask Google about plastic kayak repair.
In a nutshell here is what you will need:.
1. A power polisher. I don’t have one so I borrowed one from a friend.
2. Buffing pads for the polisher. I purchased a wool one and a finer polishing one
3. RV/Marine polishing compound. The friend who sold me the kayak gave me some.
4. 1000-2000 grit wet/dry sandpaper. I purchased the 1000 grit and it worked well for me.
5. Various screwdrivers and wrenches to remove all of the little tie downs and such.
The Process
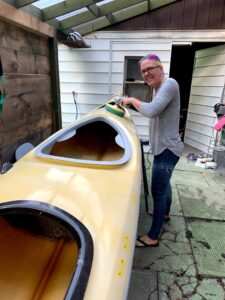
First thing you have to do is wash it to get all the dirt and grime off. I used a spray bottle with water and a little dish detergent, a cloth and a scrub brush. I worked on the underside first as it was the most scratched.
Once everything was clean I did a wet sanding with the sandpaper. You can use the same spray bottle with the water and soap. Wet the sandpaper and the kayak and start rubbing. You do this part by hand so it is a bit of a workout. If the scratches are deep you won’t get them all the way out. I did manage to get most of the small ones out. Once I was done sanding I just used the hose to rinse it all off. Then just dry it off with a clean cloth.
Now for the fun stuff, and by fun I mean power tools. My favourite! Get the wool buffing pad on the polisher, add a little compound to the pad and the kayak and go to town. Work on a small section at a time until you have covered everything. Next up, switch to the finer polishing pad and do it again. Once you have covered everything, wipe the kayak with a soft cloth to get the rest of the compound off. Voila! … you are done. You can, at this point, add some polishing wax if you want to. I haven’t done that yet but I might.
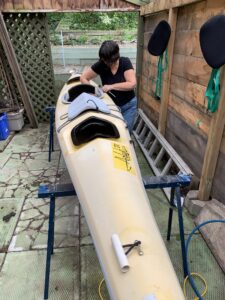
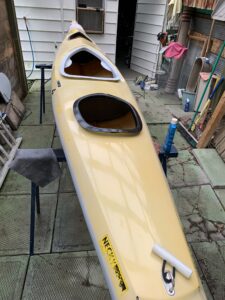
Bottom is done, time for the topside. This will require a little more prep as you have to remove all the bits as they will get caught up in the polisher. Once everything has been removed it’s the same process as above. I am pretty pleased with how much better Costanza looks. All polished up and ready for a new season.


An Apple A Day